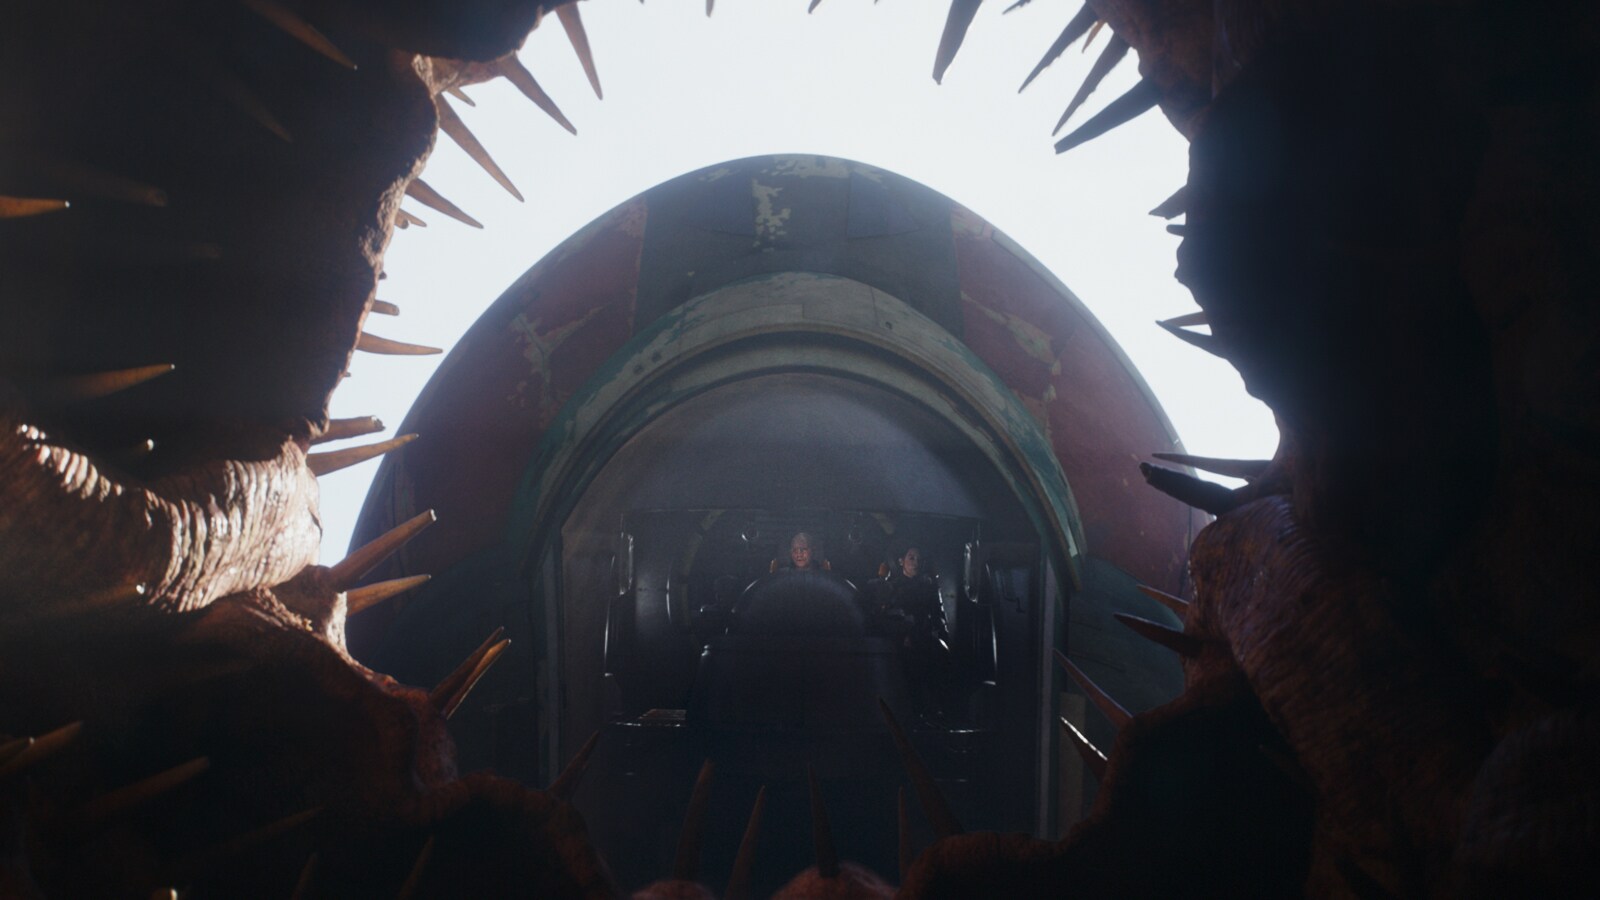
Who says Halloween costumes are only for humans? Dress up your furry friend in a handmade Star Wars pet costume to include them in the spooky festivities! These DIY ideas aren’t suitable for a pet rancor or tooka, but if you have a dog or house cat, they’ll work perfectly.
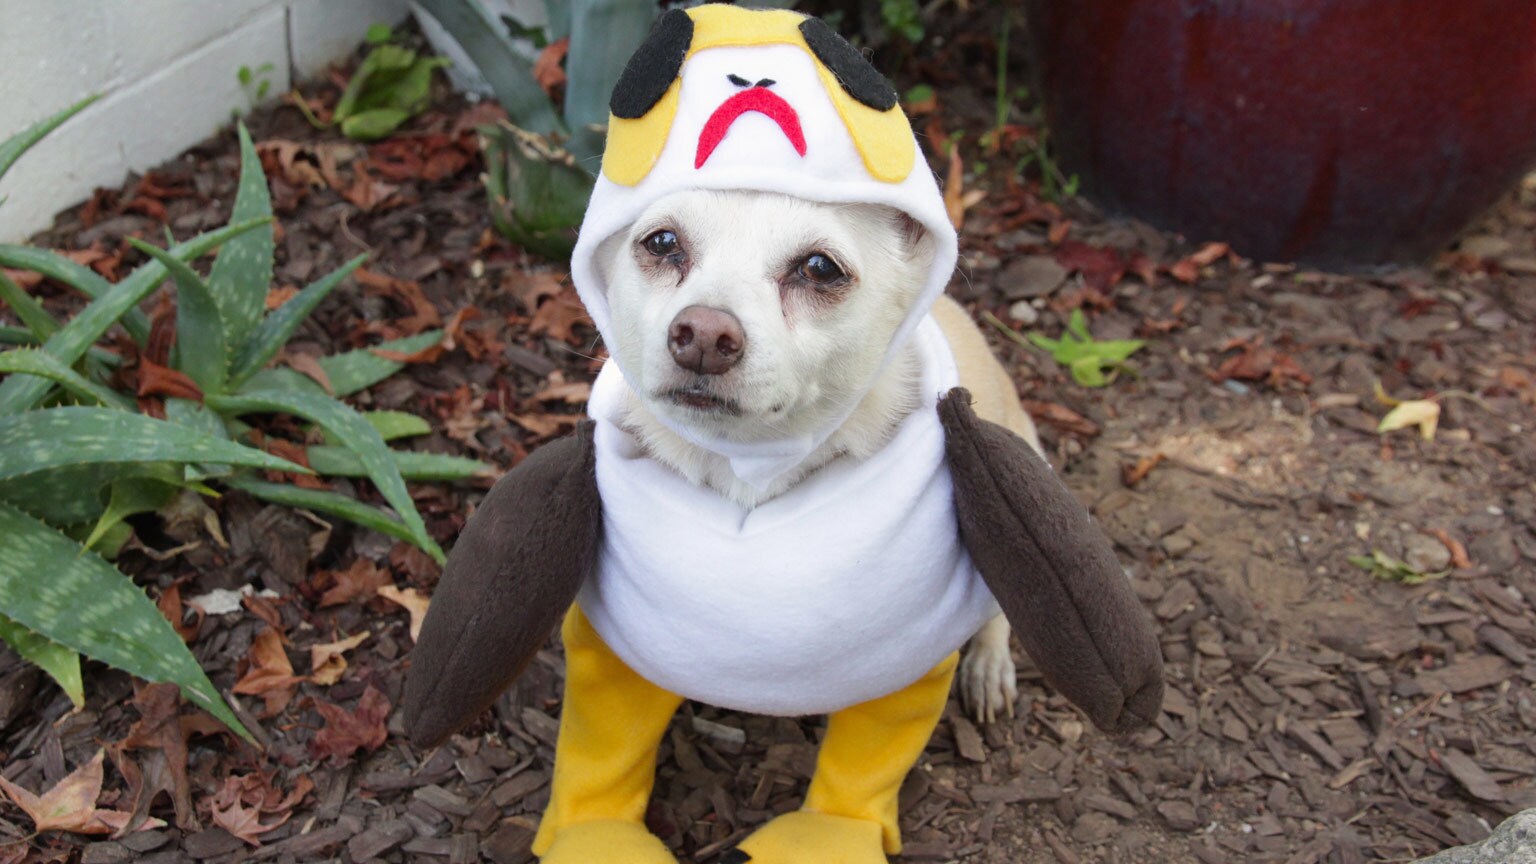
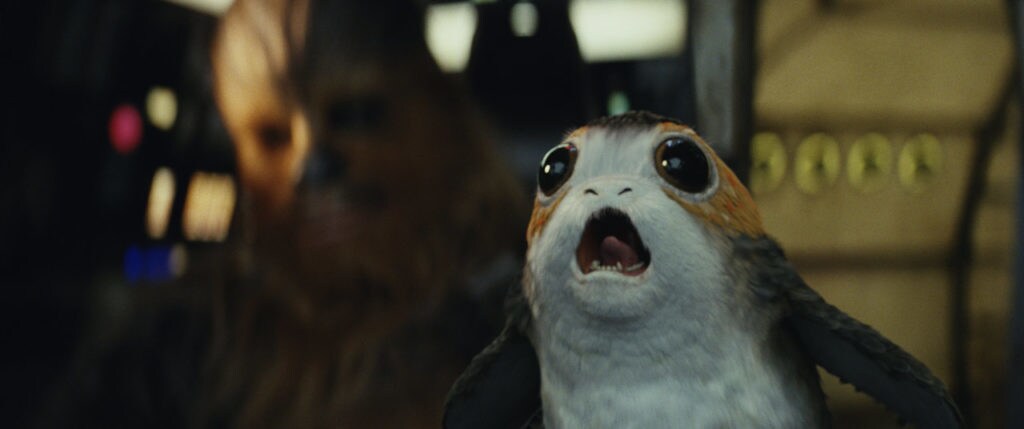
Porg (Star Wars: The Last Jedi)
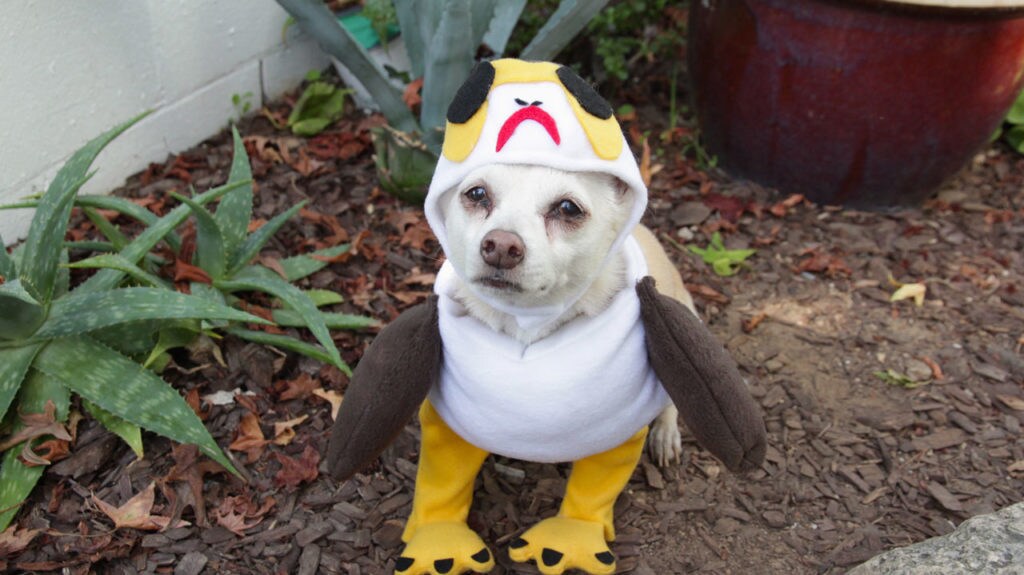
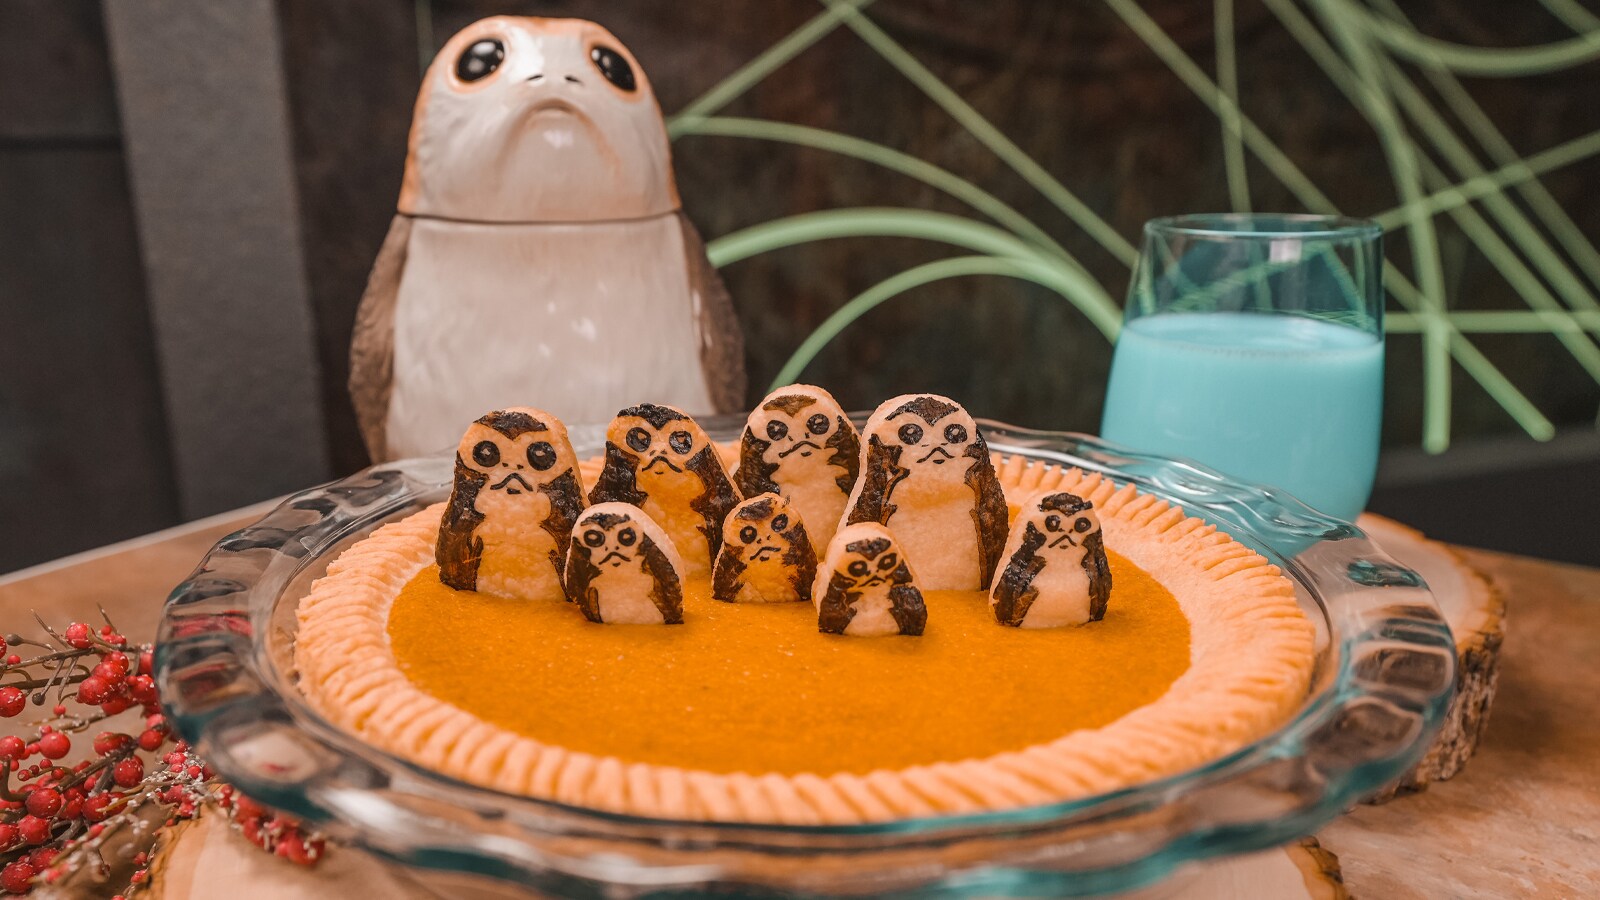
Have you ever wanted a porg to call your own? Well, here’s one way to make your Ahch-To dreams a reality! Thanks to this costume, you won’t have to retreat to a secluded island to get your very own pet porg.
What You'll Need:
- White fleece fabric
- Brown fleece fabric
- Yellow fleece fabric
- Craft felt (red and black)
- Polyester stuffing
- Velcro
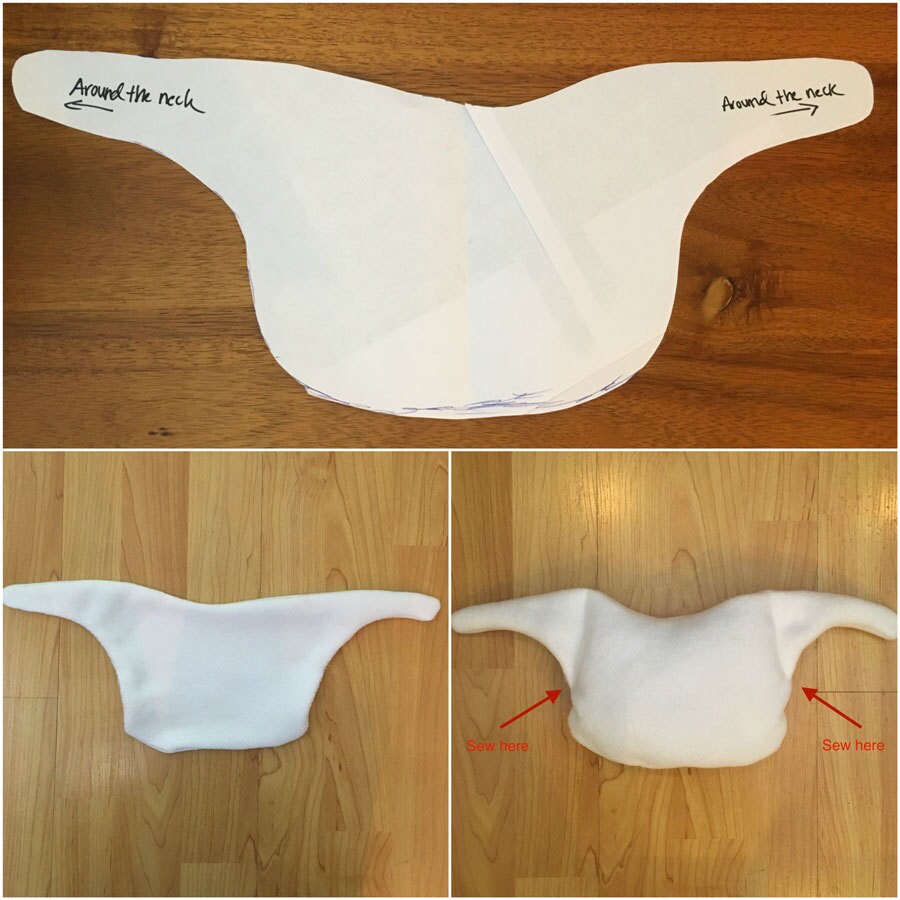
Porg Body Instructions:
Step 1: The body of the porg is basically the shape of a stuffed bib. First, measure your pet around their neck, measure from their neck down to the middle of their broad chest, and measure from the outer edge of one front leg to the other. Draw a bib shape with thick straps according to those measurements.
Step 2: Cut out the pattern and then cut out 2 bib pieces using the white fleece.
Step 3: Sew both bib pieces together around the outside, leaving a small opening for stuffing.
Step 4: Stuff the porg to create a slight puffed up chest. Hand-stitch or hot glue the small opening closed.
Step 5: Sew the two layers together on the right and left sides of the body. This will keep the stuffing in place and give the bib a more porg-like shape.
Porg Legs, Feet, and Wings Instructions:
Step 1: For the porg legs, you’ll need to take these measurements:
- Width of the porg body you just made.
- Length of your pet’s front legs.
- Width between your dog’s legs and width around your dog’s legs.
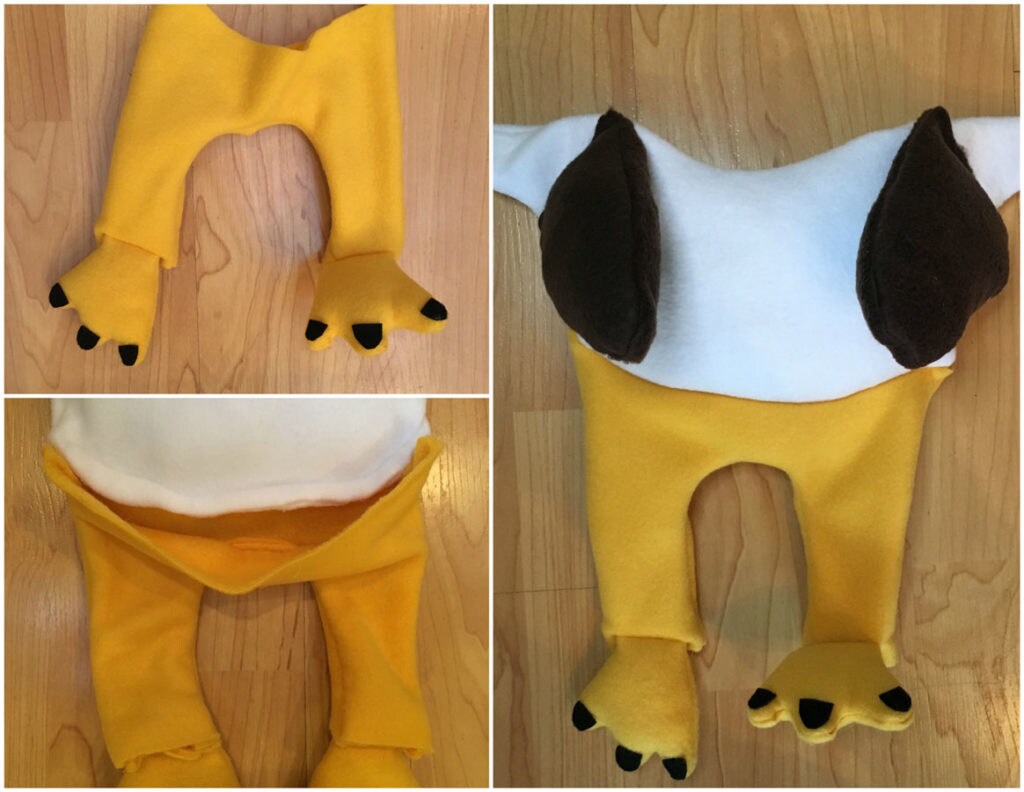
Step 2: Now, draw a pair of pants according to these measurements, adding at least an inch to the width of the pants legs. Use the shape of the porg body as your guide when drawing the top of the pants. Once you have your pattern, cut out 2 pants pieces from the yellow fleece fabric. Sew the two pieces together on the sides and inside of the pants. Leave the bottom of the legs and the top of the pants open.
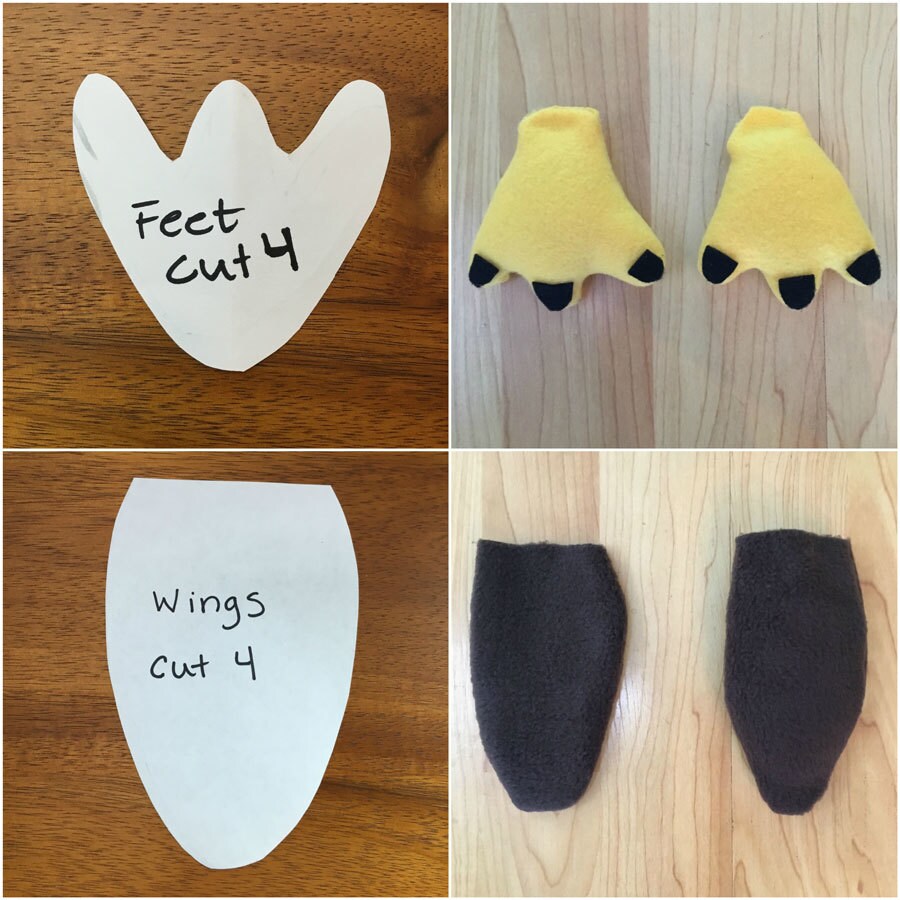
Step 3: For the feet, draw the shape of a bird-like foot. I used my porg plush for reference! Cut out the foot pattern and then cut out 4 feet pieces from the yellow fleece. Sew 2 foot pieces together on the outside, leaving a small opening for stuffing. Stuff the foot and sew or hot glue the opening closed. Repeat these steps for the second foot. Create the porg’s claws using black craft felt and attaching it with hot glue.
Step 4: For the wings, draw a wing shape onto a piece of paper. Cut it out and then cut out 4 wings from the brown fleece fabric. Sew the 2 wings together around the outside, leaving a small opening at the top. Stuff the wings, then hand-stitch or hot glue the openings closed. Attach the wings to the sides of the porg’s body with hot glue.
Step 5: Hand-sew or hot glue the backs of the feet to the fronts of each pant leg.
Step 6: Sew or hot glue the front of the pants to the front of the porg body. Leave the back of the pants open so your pet can get in and out of the pants.
Porg Head Instructions:
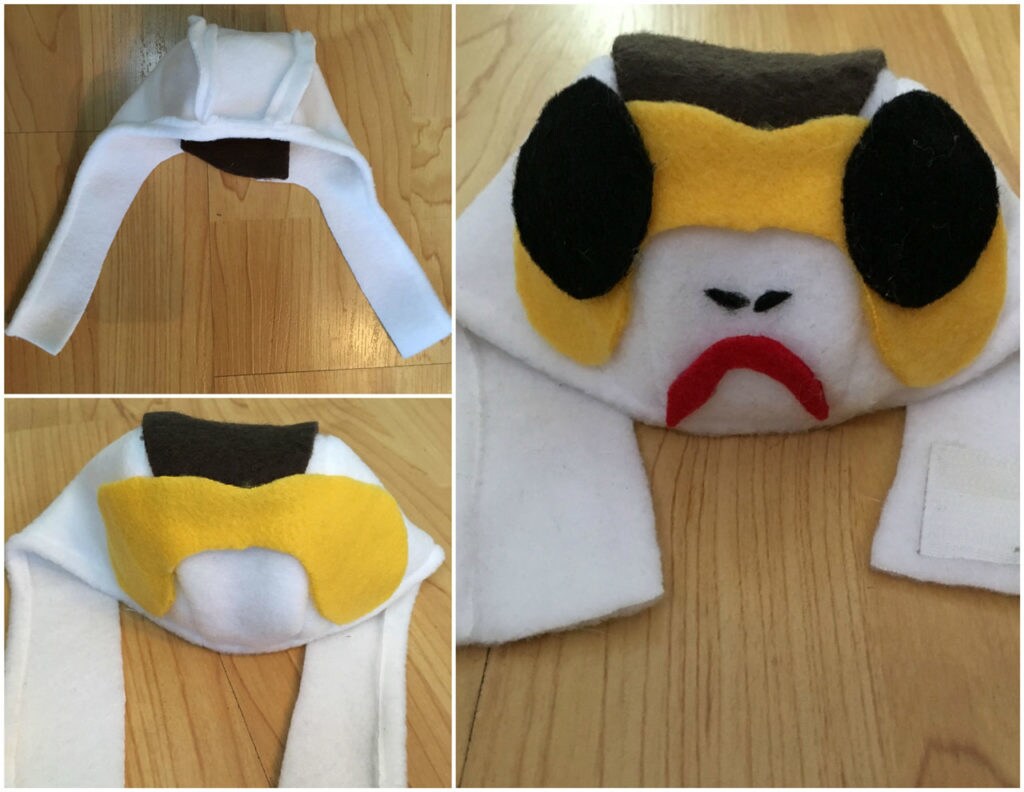
Step 1: For the porg head, I made a hat with 3 panels using a free pattern online. The pattern was originally for making a Minion costume for a cat!
Step 2: Add details to the head using brown fleece down the middle and back of the hat, and yellow fleece on the face. Use craft felt to create the porg’s nostrils, mouth, and big eyes. Attach all pieces with hot glue.
Step 3: Add Velcro to the bottom of the straps.
Your pet is now a porg and we are getting massive cuteness readings.
Star Destroyer (various)
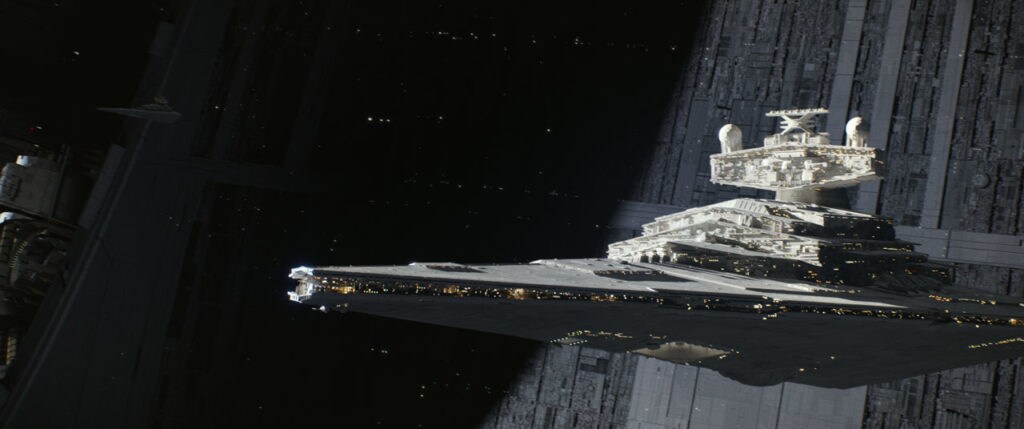
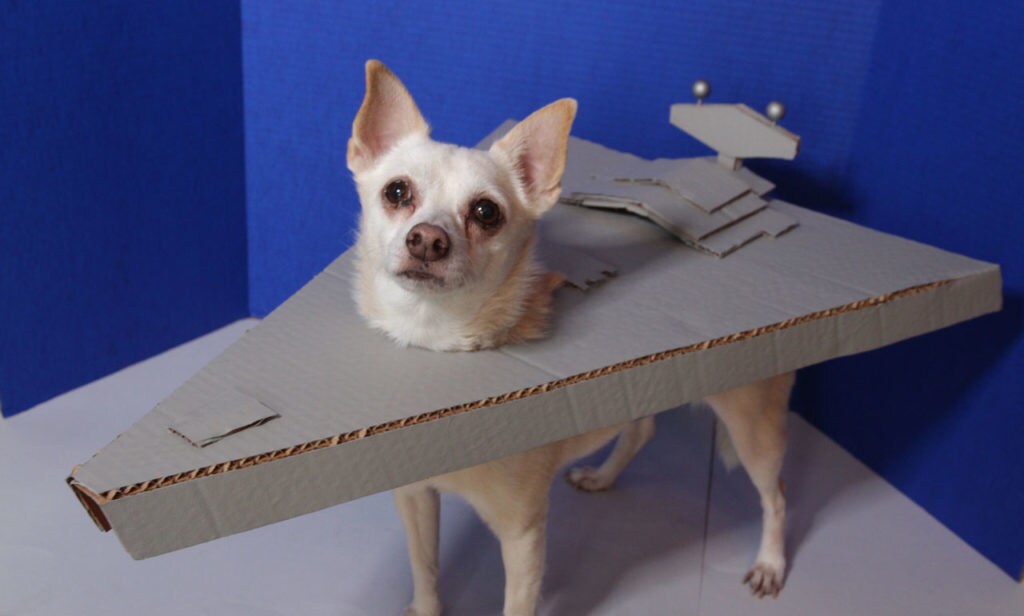
The Imperial-I class Star Destroyer is an impressive warship of the Empire, but this costume will put your pet in a class all its own. I chose to make the Star Destroyer out of cardboard, but if you want a more flexible version, you can make it out of poster board and cover it with felt. Either way, when your pet wears this costume, they’ll command a presence as a Star Dogstroyer.
What You'll Need:
- Cardboard
- Light gray acrylic paint
- Hot glue
- Fabric or elastic
- Velcro
- Toothpicks and beads (optional)
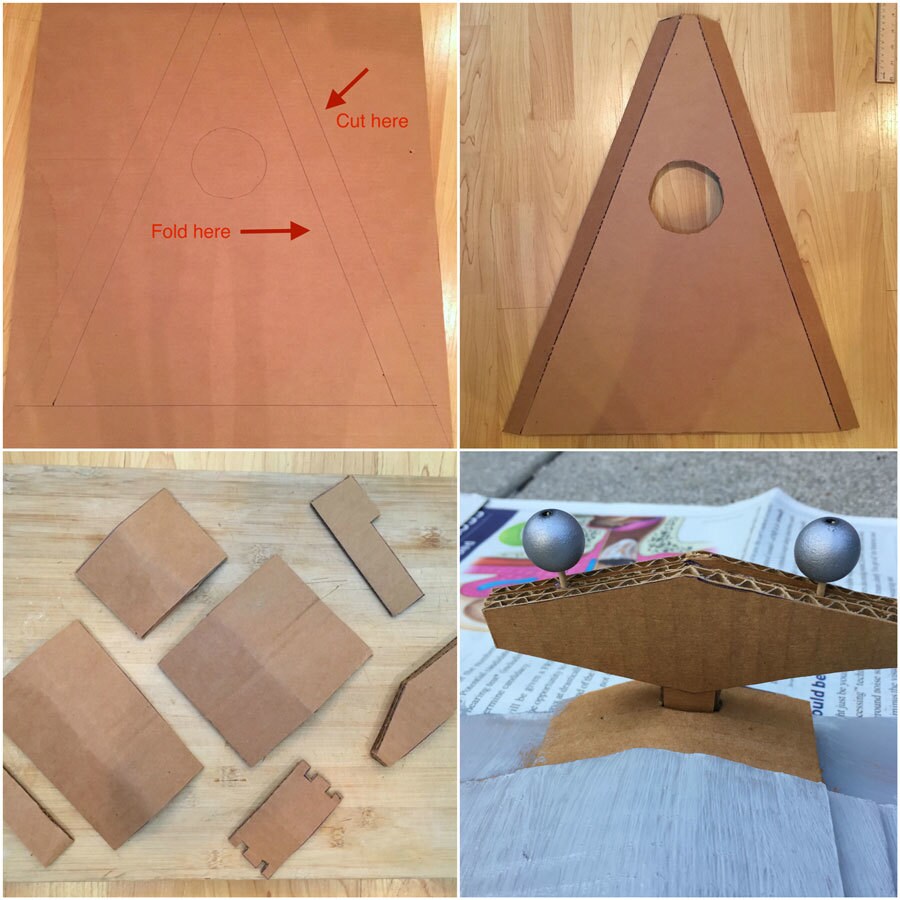
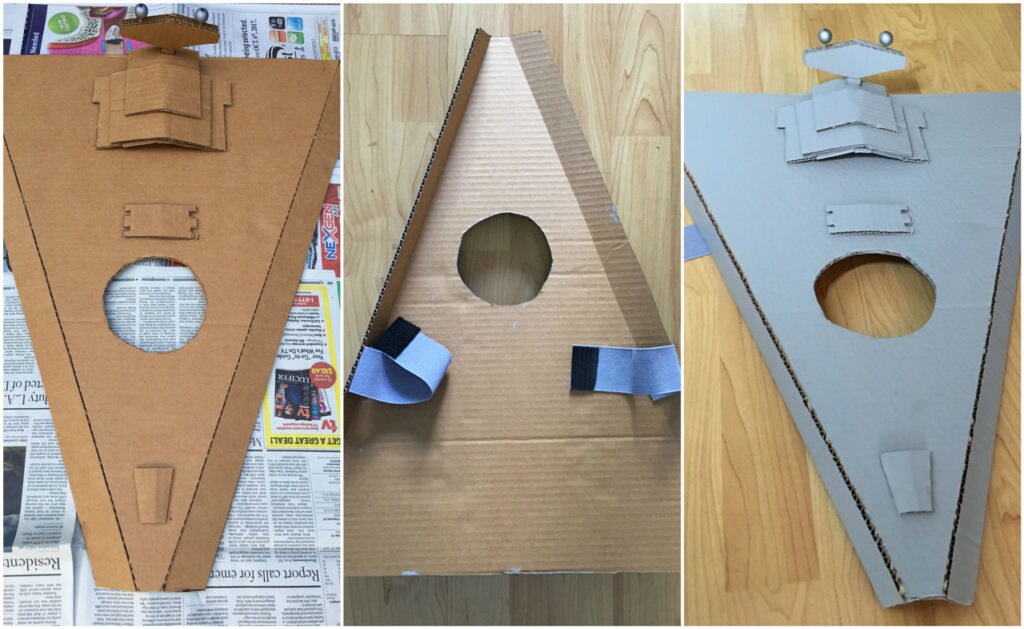
Step 1: Measure the length and width of your dog. If you want the costume to be oversized, add a few extra inches to the width of the costume.
Step 2: Draw a triangle according to those measurements and add an extra 7-8 inches to the length of the triangle. Draw two additional lines extending the triangle’s sides by 1 ½ inches. Draw a hole just above the center of the triangle.
Step 3: Cut out the triangle at the widest lines. Score the inside lines with an X-Acto knife or snap blade utility knife, then bend the sides of the triangle down. Cut out center hole.
Step 4: Create Star Destroyer details with cardboard and attach them to the ship with hot glue. I also used silver beads and toothpicks to create the deflector-shield generator domes. You can keep the details simple or go as screen-accurate as you’d like!
Step 5: Apply acrylic paint with a brush covering the entire piece. Let dry, then paint second coat.
Step 6: Attach fabric or elastic to the bottom sides of the Star Destroyer. Add velcro to straps. If your Star Destroyer is oversized (like mine), attach 2 straps to keep the costume secure on your pet.
Congratulations: your little companion is ready to serve the Empire this Halloween.
Jabba the Hutt (Star Wars: Return of the Jedi)
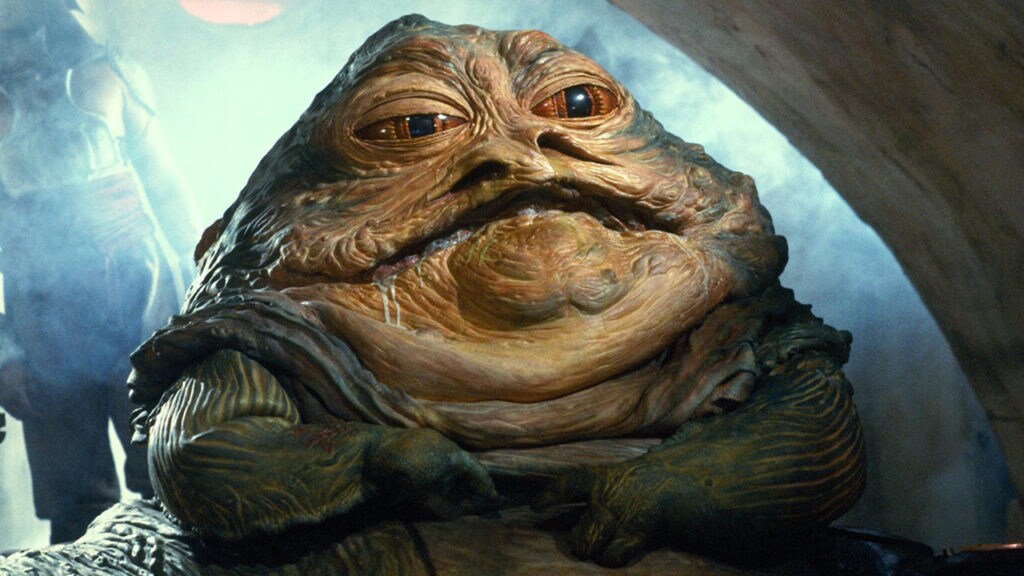
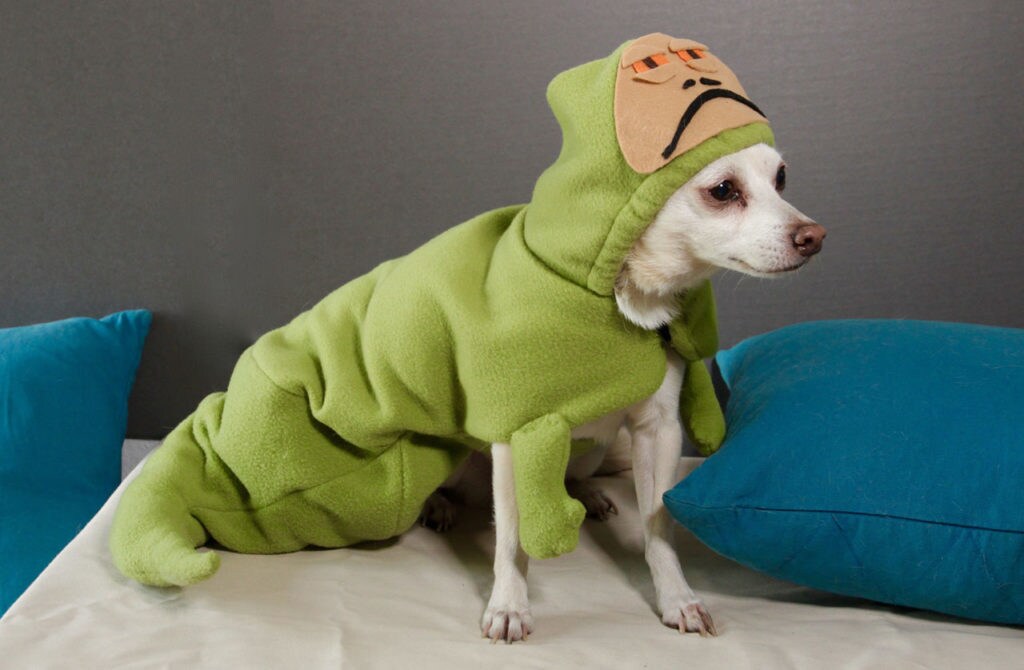
You’ve got your Han Solo costume ready, so how about partnering with a Hutt? Dress up your dog or cat as Jabba and they’ll have a cozy Halloween in this hooded Hutt coat. Don’t be surprised if they get into character and lounge around like a slug.
What You'll Need:
- Green fleece fabric
- Tan felt
- Black felt
- Orange felt
- Elastic
- Velcro
- Dog coat pattern
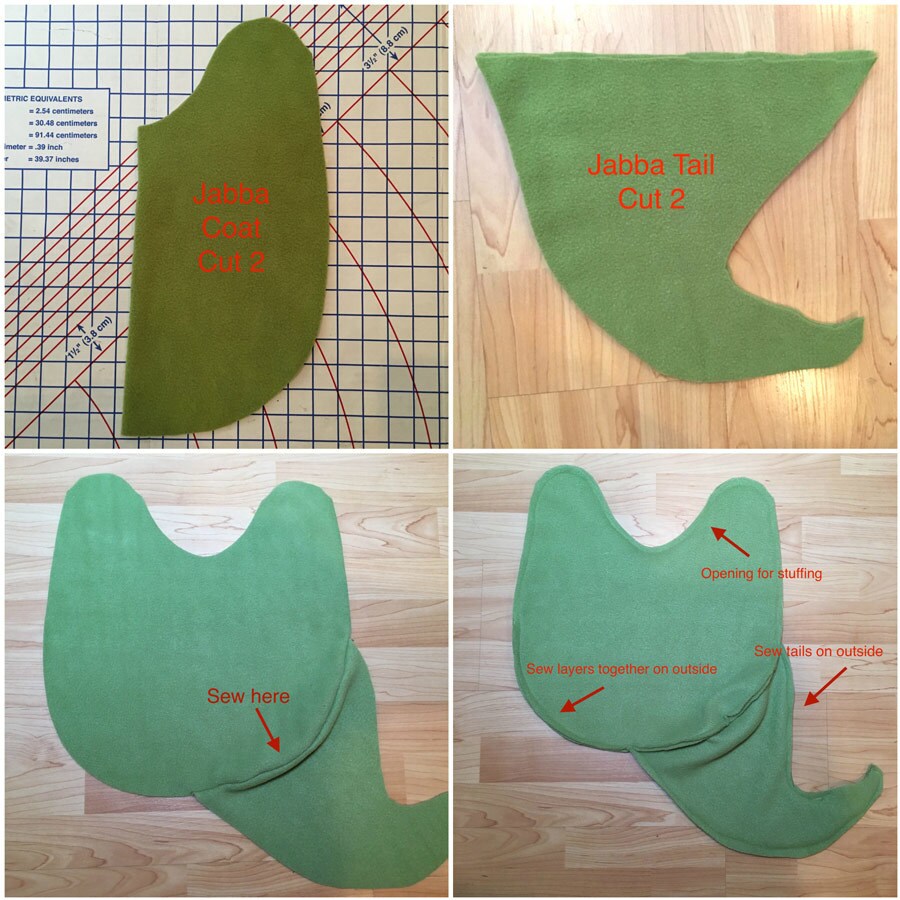
Jabba Body Instructions:
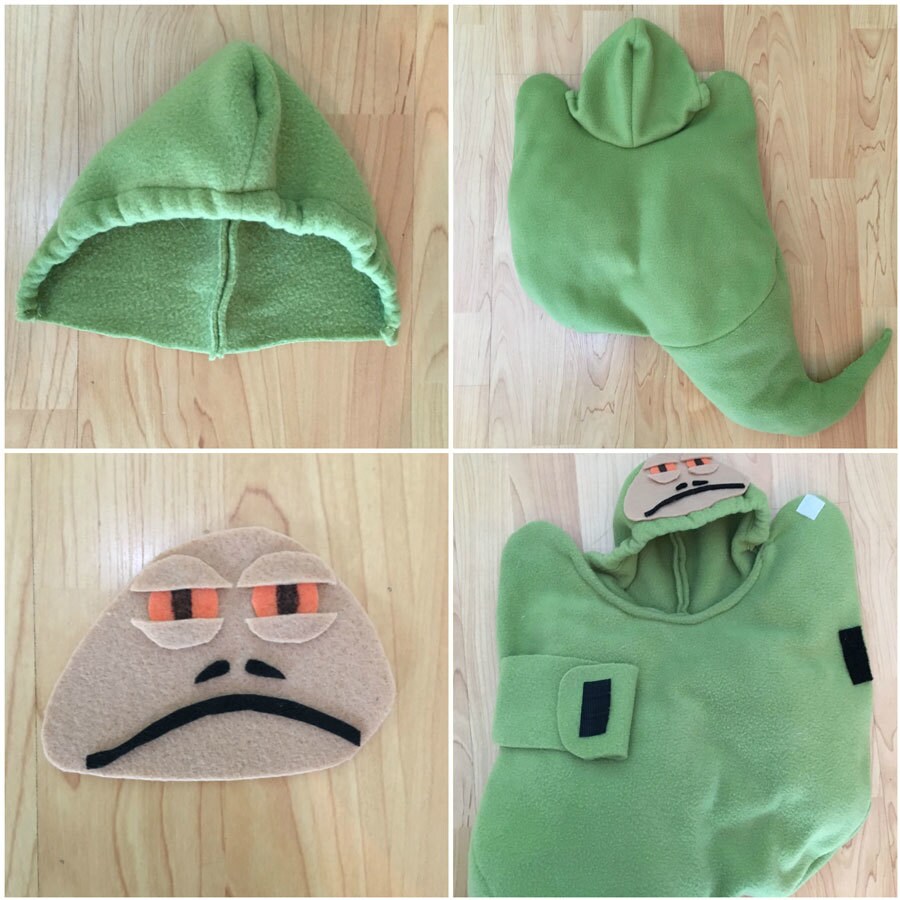
Step 1: For this costume, you will need a hooded dog coat pattern. You can find pet patterns at most fabric stores and online. Once you have your pattern, follow the instructions and cut all pieces of the dog coat. Since this costume will be padded, be sure to cut 2 coat pieces so you have a top and bottom layer of the costume.
Step 2: For Jabba’s tail, sketch the shape onto a piece of paper to make your pattern. Cut out 2 pieces of the Hutt’s tail using the green fleece.
Step 3: Pin the tail slightly off center on the body, then sew the pieces together. Repeat this step for the bottom layer pieces. Sew the top and bottom layers together around the outside of body and tail. Leave an opening at the top for stuffing.
Step 4: Fill Jabba with enough stuffing to give the costume a padded effect. Hand-stitch the opening closed.
Jabba Head Instructions:
Step 1: To create the hood, follow the instructions on the pattern and then sew the hood to Jabba’s body.
Step 2: For Jabba’s face, cut out a round shape using the tan felt. Create facial details with craft felt and attach the pieces with hot glue. Glue the face to the center of the hood.
Step 3: Attach Velcro to the coat flaps and middle strap.
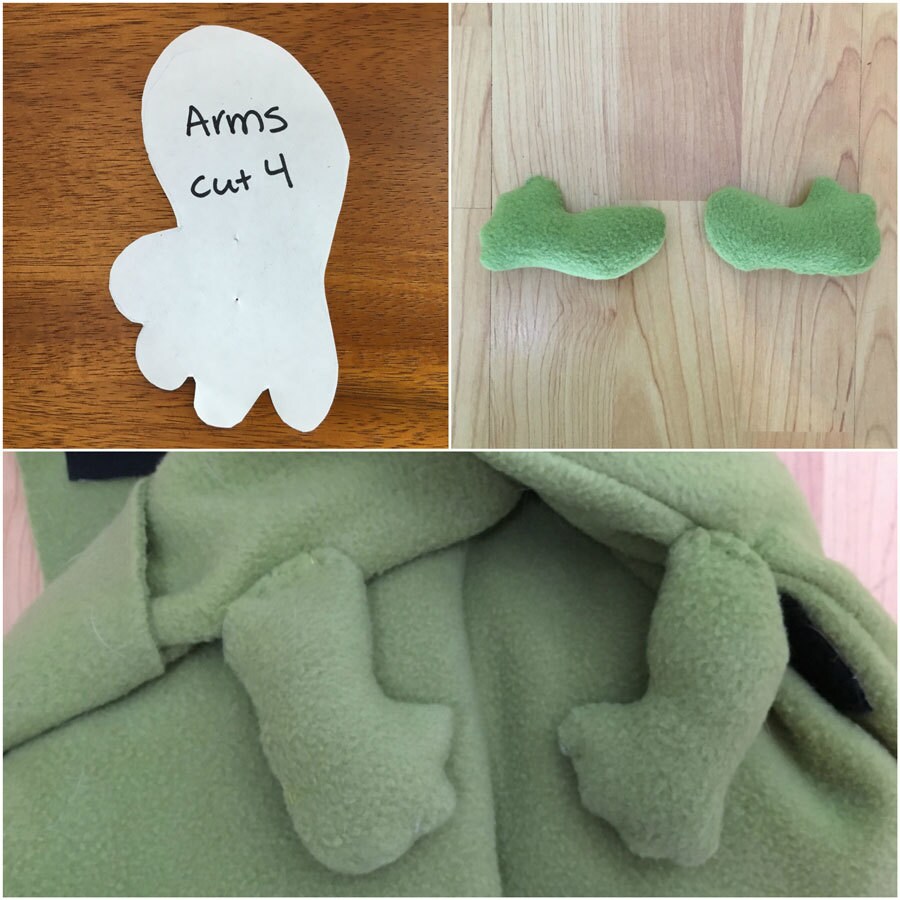
Jabba Hands Instructions:
Step 1: For Jabba’s hands, draw the shape of a small hand on a piece of paper. Cut out the shape and then cut 4 hand pieces out of the green fleece material.
Step 2: Sew 2 hand pieces together around the outside and leave a small opening for stuffing. Stuff the hand and then hand-stitch or hot glue the opening closed. Repeat these steps for the second hand.
Step 3: Hand-stitch or hot glue Jabba’s hands to his body.
Now your pet is prepared to rule the Tatooine underworld on October 31. (Just don't lose their treat cargo.)
So whether your pet is dressing up for the Empire or flitting around like a porg, this year they’ll be sure to have a Happy Howl-oween!
Jennifer Landa is an actress, host, and crafter. Follow her on Twitter @JenniferLanda and for more Star Wars DIYs, visit her YouTube channel.


