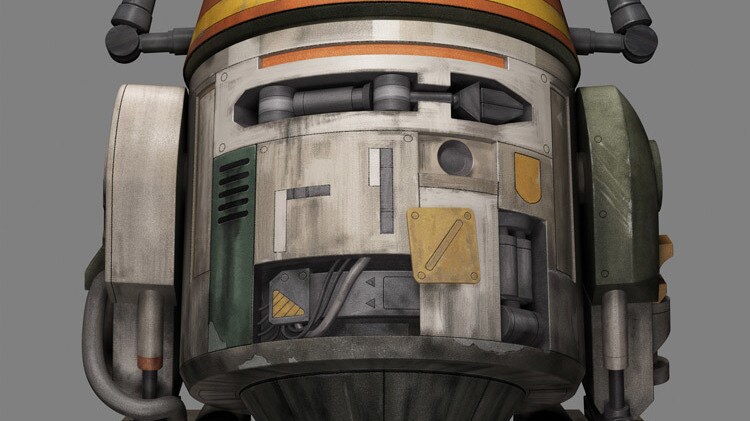
It didn't take long for me to fall for Chopper. The little droid from Star Wars Rebels appealed to me on looks alone. His short stature makes him look positively huggable. I don't think he'd appreciate that appraisal, but I don't care. It's true. When I learned he was a bit of a curmudgeon and heard him compared to a cat who doesn't care and won't do anything you tell him to, it was all over. I wanted a Chopper of my own. Until that happens, I have a list of Chopper-inspired crafts to keep me busy. I started by attempting nail art.
After examining all available images of the droid, I pulled out some gray, yellow, orange, and brown nail polish. I sketched two designs and being that I am but a Padawan when it comes to applying nail polish, I found the process challenging. You need the patience of a Jedi and a steady hand. If you have tape to make lines straight and crisp, so much the better. I got by with what I had on hand though, which was just the nail polish. I used the following colors and brands:
Gray – China Glaze, “Recycle”
Yellow – OPI, “The 'It' Color”
Brown – Essie, “Little Brown Dress”
Shimmery orange – Sally Hansen, “Lava”
Bright orange – NYC, “Times Square Tangerine Creme”
For the first design, I used everything but the bright orange. I wanted the bottom two thirds of the nails to be gray and the top third to be shimmery orange. I used a ballpoint pen to make very light dividing lines. I painted the tops of the nails first with two coats. I let each coat dry thoroughly before adding a new one.
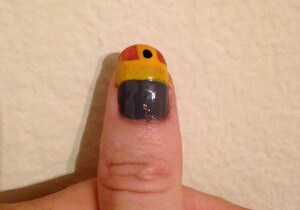
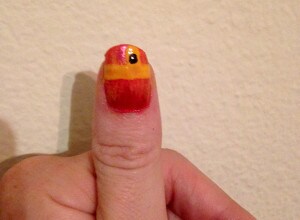
After the shimmery orange nail polish dried, I applied three coats of gray nail polish on the bottoms of the nails, again, letting each coat dry completely. When the nails were entirely dry (I can't emphasize that part enough), I carefully applied a horizontal stripe of yellow nail polish to represent the one on Chopper's dome. I used the side of the polish brush to get a more narrow line and added a vertical stripe of yellow to it for the background of Chopper's eye. The stripes have two coats of polish. Once the yellow polish dried, I added a dot of brown polish for the eye. You could use a toothpick to apply the dot, but I just used the brush in the nail polish bottle.
I realize gray polish isn't for everyone, so I also worked on a look with just orange and yellow. I applied two coats of the bright orange first. After the bright orange dried, I put a single coat of shimmery orange over it. Then, I applied a thin line of yellow nail polish and smudged it while it was still wet to blend it over the orange polish. It gave the nail a nice, smeared look. To finish the nail, I applied the yellow stripes from the first design and added the eye with a brown dot.
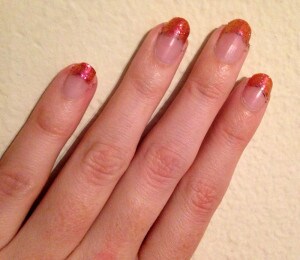
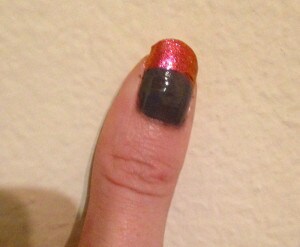
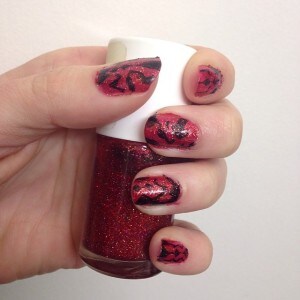
Chopper not for you? On Revenge of the Fifth this year, I added some Darth Maul flair to my nails with red glitter nail polish and a black fine-tip permanent marker. I sealed the finished nails with a top coat. This design was much easier and more forgiving than what I did for Chopper, and it looked striking.
While there are plenty of fancy tools available to help you create art on your fingernails, you can get started with what you have in your house and it doesn't have to be complicated.
Have you ever experimented with Star Wars nail art? Please share links to your photos and projects in the comments.
Amy Ratcliffe is a writer obsessed with all things Star Wars, Disney, and coffee. You can follow her on Twitter at @amy_geek and keep up with all things geeky at her blog.


